
It's been over a month since I've made a posting and I wanted to give an update on our progress.
Pat and Greenbay continue to make headway on the various projects on the house. Greenbay has completed the installation of the entire stairway and landings and has now begun the process of framing the walls in and around the stair wells. The stairs look great as you will be able to see by the photos he has forwarded.
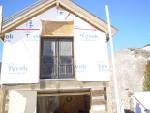
Pat continues with the installation of the hand hewn siding on the first floor and finishing various bits of framing required inside the house. The siding he has installed looks just like the balance of the logs on the entire ground floor of the house. I hope to have enough to complete in the interior of the kitchen and dining area. He has also completed much of the lower steel that is protecting and insulating the foundation. Pat has also installed several of the exterior Victorian doors that were prehung in Iowa including one very unique arched 4 panel door that includes ruby red etched glass. They all look great. The electrical is close to having a rough in inspection.
Today the hydronics installer, Christian, begins the installation of the radiant floor heating, boiler and hot water heater as well as installation of the various gas lines in the house. Right now Pat has hooked up gas fired top hat heaters and the fireplace and wood stoves continue to burn every day they work. It will be good to have some heat that stays in the house. Once we get the electrical inspection, insulation can be installed and we can actually turn the heat on. Pat will play a big part of installing the tubing into the warmboard flooring, which is a tedious and time consuming job.
Back in Iowa, the next phase of construction is beginning with all of the trim, baseboard, door jambs and interior jambs just being returned from the paint stripper. Much of the trim I had, including wide casing, plinths, rosettes, baseboard and jambs were full of nails and Nick, one of my employees in Iowa, spent several days, pulling nails. The trick to removing nails in old trim is pulling the nail through the back side of the trim, which avoids splintering around the nail hole on the finished surface of the casing.
I've been able to purchase various lots of interior trim from several locations throughout Iowa. I love the way the old trim looks and once through the stripping process, there is still much more work to do. Dip stripping all of the trim usually raises the grain on most of this old yellow pine wood. It creates a bit of a fuzz on the wood which requires sanding of every piece of trim and every door. Dipping the door, which does an amazing job of removing the paint, also removes the glue in the joints on the stiles of the doors. Once stripped, the doors then have to be drilled and pinned through the vertical stiles of the door and into the horizontal portions of the doors. Once drilled, screwed and glued, the holes are then doweled and then will be ready for sanding. Because the doors are old and have generally been planed at some point in their 100 year + lifetime, each door will most likely require one or more edges to be straightline cut so the door stiles are parallel.
I've chosen to use several old Victorian exterior doors on the interior. Installing certain types of glass such as cross reeded glass in these openings helps get light into various rooms while still providing privacy. If the doors have been cut off, they may even require additional wood being glued and screwed onto the bottom and top of the doors. The doors I ended up with have come from numerous locations across the midwest and surprisingly are nearly the same in many instances. Narrower doors such as 24" are difficult and nearly impossible to find in a full 80" height, as most were used for closet doors and only made at a 72" height. Most interior doors I have are the standard recessed 4 vertical panel doors, but I have managed to find a few horizontal 5 panels doors which were used mostly after the turn of the century. The dip stripper, located in Batavia Iowa , as well as a local antique dealer in Ottumwa, Iowa supplied me with several odd size doors I was needing. Once the doors are completed, my friend Frank Ramsey, an experienced painter begins the tedious process of sanding and applying the AMF natural finish oil to all the surfaces of the trim and doors. This will take several weeks, but in the long run will save many hours and lots of space in Rico. Once the finish is applied and wiped down, the beautiful grains of the old growth timber used in making the doors and trim will be revealed. No matter how well new trim can be made using molding cutters, newer wood just doesn't hold the charm that the old wood does. My heated garage in Iowa is being used as a work place to perform all the necessary steps in preserving these artifacts.
If the wood could only speak, it would be able to tell us so many stories about those who lived, worked, played and died in these old houses. Now with a new lease on life in a new old style home, hopefully the wood will last for 100's more years.
I've also been able to purchase a large lot of old used strip flooring, yellow pine to be exact, to install in the house. I have about equal quantities of both 3 1/4" and 2 1/4" long lengths of flooring which originated from the old Richland Iowa Opera House, torn down and removed by the Amish several years ago. My friend Paul is Amish and has a barn full of old lumber of all different kinds that he would like to sell. Perhaps I can reach an agreement and purchase the entire lot...another project for another day. Nick and I have restacked and stickered all the flooring which is now in 4 stacks 4' high, 4' wide and 16' long. It's important to sticker the flooring as the moisture content in the wood will have to adjust to its new climate before installation takes place. Generally, the wood must sit inside the house for two weeks and adjust to the air temperature before it is installed.

No comments:
Post a Comment