
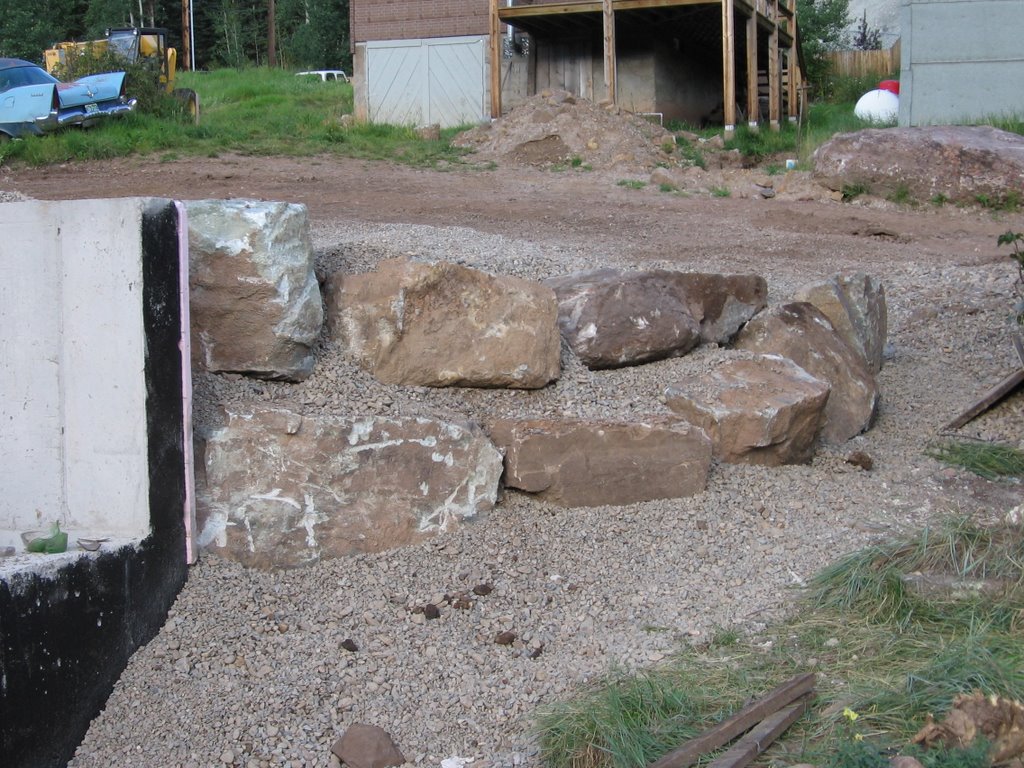
Fabian and Dylan are continuing to backfill over the newly installed septic system and once again the front of the house is beginning to look like it really has a yard. They have dumped more gravel into the patio area to bring the gravel up to grade so we can very soon pour a new slab in those areas. Fabian has expertly placed some huge boulders with the excavator to retain the dirt and gravel around the new garage and parking area, which we hope to begin working on tomorrow. He likes doing it and does a nice job.
Fabian always thinks ahead and suggests laying some underground conduit down in the gravel before the rocks are installed. This will be a channel for the propane company to run their propane line from the tank to the house. Speaking of propane tanks, my tank will be arriving on Thursday and the propane company will install the new line up to the house.
Dennis, my neighbor, works for the Town of Rico and comes up to the house for another project. Fabian, using his backhoe, digs yet another hole in the front yard and finds the water line that I had buried up to the street nearly 10 years ago. It was never hooked up to the meter and now Dennis begins preparing the hole for a new meter pit and in the next few days he will make the actual water tap into the main line on the street. With water and sewer, all I need is a toilet and sink and we can move in...well maybe not just yet.Joe and I take some time out to put together a new material list and a final check on the windows we need to order. We make a few changes on windows and will wait for a final estimate to come back. Joe has retrieved some drilled steel plates from his garage that we will cut up to make some nice rusty metal corner brackets for hanging our beams off the stairwell header.
Today Greenbay and I continue and complete the framing for the 2nd floor over the kitchen. Most of the beams are old reclaimed rough sawn beams that came out of an old barn. We have doubled up two 3” x 8”s and bolted them together with some old square headed lag bolts that I brought from Iowa. I like the way they look. We will need some longer ones in different areas around the house and tomorrow I will pick up some that I saw sitting in some old buckets at Belt Salvage in Cortez. This doubled up beam becomes a stronger member to hang the header for the staircase off of. The header is a 4” x 10” and we notch and cut it for a nice fit. One side of this beam will become a face for the final stair riser going up to the 2nd floor once the stairs are completed.
Because of the variation in dimensions of the beams, each one of these has to be notched specially to fit on the ledge on both the south and north walls of the kitchen and dining area. Because they will be exposed, care is taken where each one will be placed. Any imperfections or forklift marks are hidden as much as possible. We have found that these old beams are very straight and once they are installed we find them consistently straight when eyeballing across the top surface.
We will be ready to install the heart pine subfloor soon. The heart pine material came from an Amish friend of mine, Paul, who lives near Kalona, Iowa . Paul had a contract to cut heart pine flooring. By using a band saw and cutting through some very big heart pine beams, the beams are sawed into 1” thick slabs and then machined into expensive tongue and groove flooring. If you’ve ever seen this type of flooring, you’ll understand why there is such a big demand. It’s beautiful. Before he starts cutting the beams up, he has to cut the initial face off the beam. These cuttings are usually about 5/8” thick and when cut off give the next cut a fresh face. My friend Jim bought all the 1st cuttings which aren’t considered thick enough to use for flooring. Since the beams I’m using will be exposed in the kitchen and dining room area, these heart pine slabs will work perfectly for a sub floor before laying down the 2nd floor warmboard. We will turn the cut face down and then attach the warm board plywood over the top.
technorati tags:Rico, Colorado, reclaimed+lumber, hand+hewn+log, log+cabin, salvage

No comments:
Post a Comment